Dynamic image generation with AWS API Gateway and Lambda
The combination of API Gateway and Lambda is very powerful. It allows you to build some complex functionalities without maintaining any virtual machines yourself. Lambda can be hooked up to many other (AWS) Services including DynamoDB, Kinesis and S3. This paradigm, better known as serverless, is truly upcoming for years now and its certainly time to jump on the bandwagon if you haven’t done so already.
One of the better-known use cases of AWS Lambda is the generation of thumbnail images as images are inserted into S3. In this blog post we will go one step further and generate images based on the URL and return the image as a binary through API Gateway. The number of possibilities this unlocks are pretty much countless, including the generation of charts, bar codes, dynamic icons and much more.
Awesome, right? Let’s get started! First, we will set up a basic Lambda function that will return a hardcoded image. Next, we set up API Gateway including forwarding the request to the Lambda function. Finally, we will change the function so that the generated image is dynamicly based on the specified URL.
I’m not going to dive in depth into either of the services: some at least minimal experience with these services is recommended.
Create Lambda function #
First of all, download or install NodeJS through your preferred method. Be sure to get version 4.X as this is the version currently supported by Lambda. Next, create a new directory where we will package the zip file. In this directory, run the following command to fetch the required dependencies:
npm install gm gm-base64
If you are not familiar with NodeJS: npm is the most commonly used NodeJS package manager to fetch external dependencies. If you take a look at the current directory, you will find a new directory node_modules where these dependencies are downloaded to. The first dependency listed, gm, is the GraphicsMagick library, though we will actually be using ImageMagick as we will see in the code snippet up next. Reason is that the ImageMagick binaries are by default installed on the Lambda instances and therefore easier to use. The gm-base64 library is a small addon that allows us to export the generated image as a base64 encoded string.
Next, create an index.js file and add the following function:
var gm = require('gm').subClass({ imageMagick: true });
require('gm-base64');
exports.handler = (event, context, callback) => {
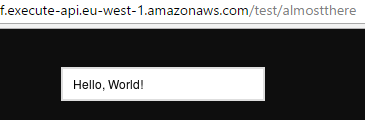
gm(200, 30, '#fff')
.drawText(10, 20, "Hello, World!")
.border(2, 2).borderColor('#ff0000')
.toBase64('png', function(err, base64) {
callback(null, base64);
});
}
Let’s quickly go through this really easy function. As mentioned, we subclass GraphicsMagick so that we will actually use ImageMagick. Next we load the base64 library. Lambda requires you to make the main function available through the exports.handler method (by default: the name of this method can be overridden). We create a method that requires three parameters of which the last one is the callable used to return a response. We then use ImageMagick to create a 200x30 image with the text “Hello, World!” and some minor graphical tweaks. We use the callback function to pass back the base64 encoded string. We will use the event parameter later on.
Ship the Lambda function #
Next, zip the contents of the entire directory (including the dependencies in the node_modules directory). In your AWS account,open up the Lambda page and create a new function. Select the blank template and specify no trigger. Name the function however you want; the name I used is generate-image. Select the NodeJS 4.3 runtime and select the “Upload a .ZIP file” above the sample code. Here, select the zip file you just created. For the IAM Role, select the “Create new role from template(s)” option and give the role a name (such as generate-image-role). We don’t need any extra permissions other than the defaults AWS will setup for you.
Leave the default values for the other options. Click “Next”, review your settings and click the “Create function” button. After a few seconds, the function is created and at the top you will find the “Test” button. Click it and lo and behold: a base64 encoded string appears! We will come back to this function later so keep it around.
Set up API Gateway #
With the Lambda function in place, its time to setup an route to this function with API Gateway. A number of steps are required to get it setup correctly, so lets go over them one by one.
First, create a new API and give it a name (I went with the not very creative “Generate Image”). Create a new resource through the Actions dropdown: name it “image” and specify {text} as the path. This is the variable that we will be passing to the Lambda function. Next, create a GET method through the same dropdown. Select “Lambda” as the integration type and select the region where your function lives. Start typing the name of your function to have it show up and select it. After clicking “Save” you will give API Gateway access to the function. Now, click on “Integration Request” and open up the “Body Mapping Templates” tab. Specify “never” as we are not interested in the body of the request. Specify the application/json (which is the default) content-type, and add the following code for the template:
{
  "text": "$input.params('text')"
}
Click save. As we will see when we come back to the Lambda function, the {text} variable will now be passed through to the Lambda function.
We are halfway there: API Gateway forwards the request correctly to AWS Lambda, but we still need to do something with the response we receive from Lambda. As you will recall, this is a base64 encoded string but we need to transform this to binary data first.
Binary payloads were introduced quite recently (November 2016). For some reason, the option is not available in the console when Lambda is selected as the integration type. With some help from a Stackoverflow answer (story of my life!), we can enable this with a single API call:
aws apigateway update-integration-response \
  --profile davemaple \
  --rest-api-id [api_id] \
  --resource-id [resource_id] \
  --http-method GET \
  --status-code 200 \
  --patch-operations '[{"op" : "replace", "path" : "/contentHandling", "value" : "CONVERT_TO_BINARY"}]'
Be sure to replace the api_id and resource_id with your IDs. They are easily found in the breadcrumbs at the top of the API Gateway console. A successful API call will give you the following response:
{
  "statusCode": "200",
  "contentHandling": "CONVERT_TO_BINARY",
  "responseTemplates": {
    "application/json": null
  }
}
To test if everything is OK up to now, return to the API dashboard and click the “Test” button on the left. Here, enter some dummy text for the “text” variable and click the “Test” button. If you receive some garbled, binary data, everything is working as it should!
Finally, open the Method response screen. Click on the 200 status and select “Add Header”. Specify Content-Type as the value. On the right, change “application/json” to “image/png”. This ensures that we return the correct Content-Type of the payload we are returning (which is a PNG image). Otherwise, the browser would treat it as simply text and would show the same garbled binary data we saw before in the test.
Deploy your API #
That’s it! Deploy your API through the same dropdown as before. Create a new stage with the name “test”. You will now see the URL through which the API is available. Clicking the URL will give you the non-intuitive error {“message”:“Missing Authentication Token”}. The real problem is that there is no route defined for this URL. Therefore, append a slash and some random text behind the URL and voila, you’ve got an image generated through Lambda.
According to the documentation, you also need to enable binary support for the image/png content type on the “Binary Support” page accessed in the left menu. To be honest: I’m not sure why, as it already works.
Back to Lambda #
With API Gateway setup, all we need to do is use the text variable that is passed to the Lambda function. Open up your function again and change the line that adds the text to the image (line 6) to the following:
.drawText(10, 20, decodeURI(event.text))
The text is passed through to the event in the event.text variable. In addition, we use the decodeURI function to get rid of escaped characters, such as a space being replaced with %20. Re-create the zip file with the edited code and upload the code in the same way you did before. We don’t need to deploy API Gateway again as it simply passes any new requests to the update Lambda function.
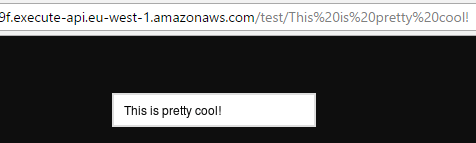
Open up your browser again and navigate to your API URL. Enter some text and you will find it is added to the image:
Keep in mind that you have to specify a valid URL to make this work. For example, an URL like test/some%text will error because it expects an encoded value after the % sign. I would especially recommended to use this method through the HTML <img> element as you will have full control over what URLs are passed to API Gateway.
Have fun playing around with API Gateway and Lambda and let me know what you come up with!