Table of Contents
AWS API Gateway is a managed service from Amazon Web Services that allows you to easily create an API endpoint. An incoming request can either be forwarded to an HTTP endpoint, can invoke a Lambda function, or connect to an AWS service. Arguably, the Lambda integration is most commonly used as it allows you to invoke a piece of code without managing a server or operating system (thus, combined with API Gateway, creating a serverless api). A common use case is to store and retrieve data to/from a database.
DynamoDB is one such database, fully developed and managed by AWS, which integrates 100% with the AWS API. This is different from for example Redis and MySQL where you have to use the redis/mysql client to communicate with those services. This means that using the AWS Service integration in API Gateway, you can fully communicate with DynamoDB. In other words: we can build a REST API that stores and retrieves data without writing a single piece of code!
In this blog post I will walk you through setting up a serverless API. The functionality we will build is storing and retrieving the favorite movie for a person. First, we’ll create a DynamoDB table to store the data. Next, we setup API Gateway to communicate with the table.
Setting up DynamoDB
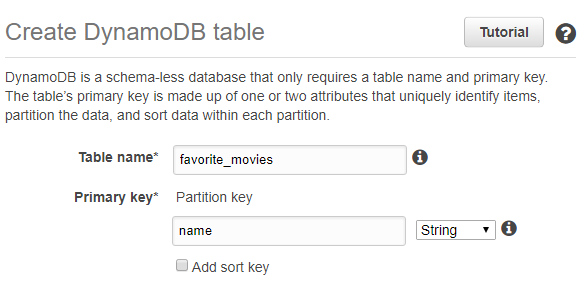
The DynamoDB table that we will create is going to be as simple as they get. We will use the names of our friends as the partition key. In the “favorite_movie” column we store the name of the favorite movie of said friend.
To setup the DynamoDB table, open up the DynamoDB console. Configure it according to the below screenshot. I’m using the default settings for the throughput, but feel free to disable auto-scaling and reduce the read/write capacity to 1 to save some costs.
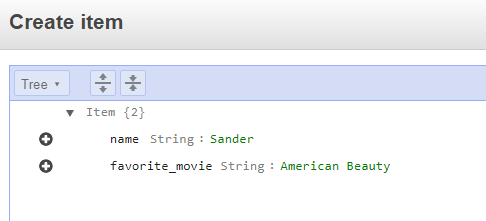
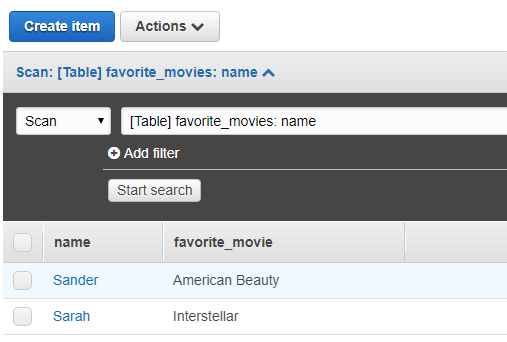
After a minute or two the table will be created and we can store our first test item. Open up the “Items” tab and click on “Create Item”. Use whatever name you want as the ID and use the plus button on the left to append an extra column to store the favorite_movie (be sure to use this key if you are following along!). It should look something like this:
With some test data in our database, it is time to retrieve this data using API Gateway.
Configuring API Gateway
The API endpoint we will build is going to be very simple. Performing a GET request on /{name} will give us the favorite movie of whoever is called {name} (which is, obviously, a variable). A PUT request on /{name} will insert or update the favorite movie for this person. All content sent and received will be in JSON.
The GET endpoint
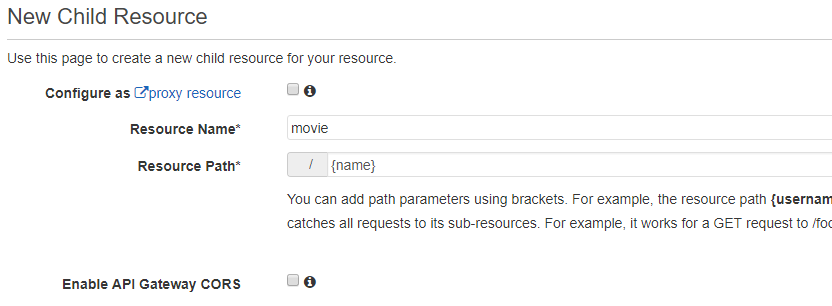
Create a new API endpoint using the API Gateway Console. Select “New API” and give it a name such as “favorite movies”. On the root level of your API, create a new resource called “movies” that only accepts the single variable “name”, like this:
Next, create a GET method under this resource. Configure it to perform the “GetItem” API call for DynamoDB in the region where you are working on. Your configuration should look something like the following:
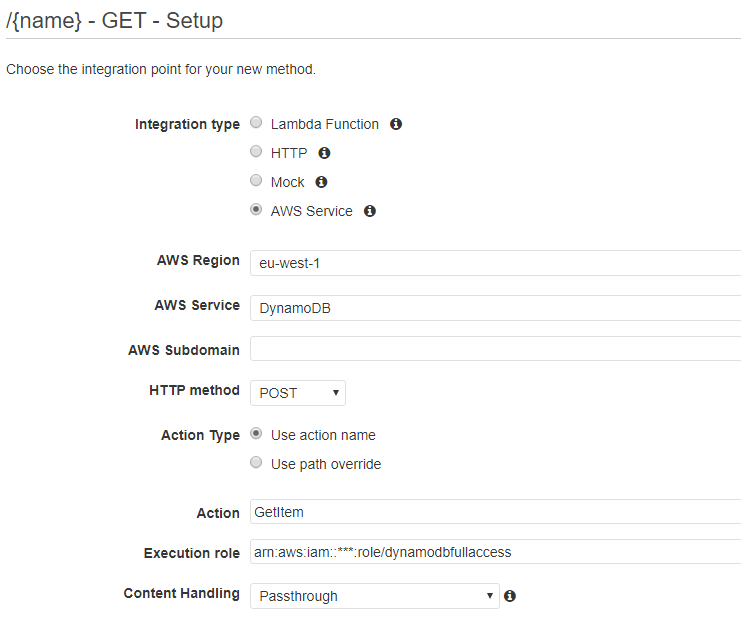
You might be confused that we choose “POST” here as the HTTP method. This is because all DynamoDB API calls are “POST” methods under the hood. For this tutorial it’s easiest to create an IAM role with full access to DynamoDB. Keep in mind that for production situations, always go for the least-privilege principle. Only give API Gateway read and write access to the specific table. You can even consider creating two different IAM roles for the two endpoints: one that can only read, and one that can only write.
Next, we need to transform the HTTP request coming into API Gateway to a proper GetItem API request for DynamoDB. In the API Gateway console, select the Integration Request. All the way at the bottom we can select the Body Mapping Templates. Here, create a new application/json mapping template with the following configuration:
{
  "TableName": "favorite_movies",
  "Key": {
    "name": {
      "S": "$input.params('name')"
    }
  }
}
Before, we configured {name} to be a variable. Here, we retrieve the value of this variable and form a proper JSON object that is accepted by the GetItem API call. Click “Save” at the bottom of the page.
We can now test this endpoint. Choose the “Test” icon in the API Gateway console and fill in the name of the test data you entered before in DynamoDB. You will now see something like the following:
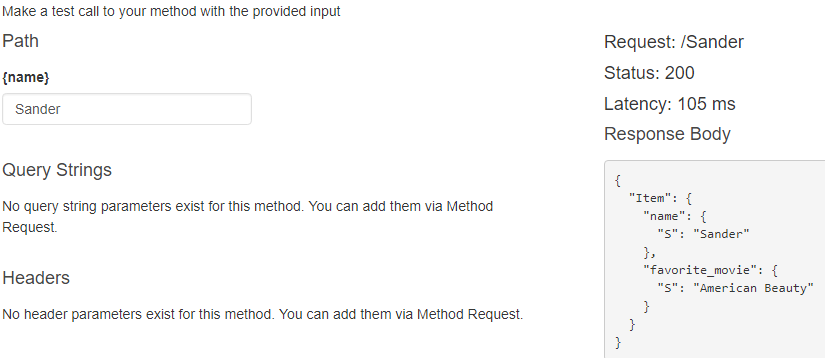
Awesome! That data is coming directly from DynamoDB. The “S” keys in the JSON are there to show that the values we receive are strings. These would be example be an “N” for number values stored in DynamoDB. This syntax is specific to DynamoDB. In order to have our API return a more common syntax, we are going to transform this data.
Open the “Integration Response” screen and open the 200 response status that is already configured. Here, open the application/json body mapping template and specify the following template:
{
  "name": "$input.path('$.Item.name.S')",
  "favorite_movie": "$input.path('$.Item.favorite_movie.S')"
}
Given the response syntax from the GetItem API call, we can transform the syntax into a more simple format. Click “Save” at the bottom of the screen. Test your API again and you will now see the improved syntax returned.
Next, it’s time to configure the PUT endpoint so that we can store data in DynamoDB.
Configuring the PUT endpoint
Under the /{name} resource, create a PUT method. Use the exact same configuration as for the GET endpoint, but now with “PutItem” as the API Action to execute. Again, specify a body mapping template for the integration request, now with the following template:
{
    "TableName": "favorite_movies",
    "Item": {
        "name": {
            "S": "$input.params('name')"
        },
        "favorite_movie": {
            "S": "$input.path('$.favorite_movie')"
        }
    }
}
Here we transform the JSON request coming into API Gateway into the proper format for the DynamoDB API call. Save the template and test the PUT API endpoint. This time, besides specifying a name, you can specify a body template for the PUT request. Add something like the following:
{
    "favorite_movie": "Interstellar"
}
Click “Test” and you should receive a 200 OK without any data. Take a peek at the items in your DynamoDB table: the new record has been added!
Looking at the PutItem documentation, you will see that PutItem either creates or updates an item the table. Try this out by overwriting the data for an existing user: it will simply change the favorite movie meaning we can automatically also update items in the table, not only create.
We now have both a functional GET and PUT endpoint configured using API Gateway. Deploy your API so that we can test it in the browser. For me, it looks as follows:

Using your favorite REST client, try to PUT an item into DynamoDB using your API Gateway URL. They will show up in your DynamoDB table, and be available through a GET request in the browser.
Moving on
The example given in this blog post really only touches the basic functionality provided by API Gateway. There are many more options that can make this setup even more powerful. Consider using the following features to enhance your API endpoint:
- Secure your endpoint using custom authorizers. This allows you to accept requests only when a specific header is set, when the request originates from a specific IP, and more. This is especially interesting for endpoints that change data, allowing you to give read access to everyone but write access only to known entities.
- Use the AWS Cognito integration to give access to your endpoint only to known, logged in users. A user performs the request using the Authorization header with an access token. If the access token is valid, you receive the unique ID for that user from AWS Cognito. You can then store and retrieve records per-user by using that unique ID as the partition key or as an index in DynamoDB. This will also work with other Identity Providers such as Google, Facebook, or your custom one.
- Use API Caching to improve performance for your clients in case of data that can be cached. You will hit DynamoDB less often, allowing you to decrease the required read capacity, saving costs.
- Using the DynamoDB Set type, we can store a list of favorite movies instead of a single movie. Combined with using foreach in the API Gateway body template, this allows you to both retrieve and store a list of items instead of a single value.
Conclusion
In this blog post I have walked you through creating a serverless API using API Gateway and DynamoDB. The main benefit here is that “not even” a Lambda function is required, as we can directly execute AWS API calls from API Gateway. This is truly a zero-maintenance solution, allowing you to quickly and easily create new API endpoints.
Keep in mind that when you want to use different datastores such as MySQL or Redis, you will still need to use a Lambda function as it is not possible to insert or read data to/from those datastores with the AWS API. Therefore, this setup really only works when using DynamoDB. With features such as auto-scaling, automated item expiry and streams, there certainly is enough reason to at least try it out. Have fun!