Table of Contents
In this blog post we’ll go through the steps of creating an automated deployment pipeline for Kubernetes using GitLab. In the end we’ll have a simple Go application running that very excitingly returns “Hello, World!”.
Prerequisites
Before we can begin our quest for automation, we’ll need to set up some tools. Many alternatives of course exist to the tools that I pick. Feel free to use any other option, but make sure to make any necessary changes if you are following along with this post.
Kubernetes
Let’s begin with setting up a Kubernetes cluster. There are many ways to get one, and it does not really matter how you set one up. I’m personally happy with the eksctl utility which makes it really easy to set up an AWS EKS Cluster.
Please note that there is some pricing involved with spinning up this cluster. You pay $0.20 per hour for the Amazon EKS control plane. You’ll also pay $0.0228 per hour for the t3.small worker node that we spin up.
Check out the documentation on eksctl.io to install and configure the tool. Then you can spin up the Kubernetes cluster with the following command:
eksctl create cluster --name=go-hello-world --nodes=1 --node-type t3.small
This will take around 10 to 15 minutes. Once the cluster is created, you can set up your kubeconfig file using the AWS CLI’s update-kubeconfig command as follows:
aws eks update-kubeconfig --name go-hello-world
Check to see if your worker node has properly registered with the following command:
kubectl get nodes
Finally we’ll create a gitlab service account that we’ll use to deploy to Kubernetes from GitLab. Create a file called gitlab-service-account.yaml with the following contents:
---
apiVersion: v1
kind: ServiceAccount
metadata:
  name: gitlab-service-account
---
apiVersion: rbac.authorization.k8s.io/v1beta1
kind: ClusterRoleBinding
metadata:
  name: gitlab-service-account-role-binding
roleRef:
  apiGroup: rbac.authorization.k8s.io
  kind: ClusterRole
  name: cluster-admin
subjects:
  - kind: ServiceAccount
    name: gitlab-service-account
    namespace: default
Apply these settings with the following command:
kubectl apply -f gitlab-service-account.yaml
This will create a new service account and attach admin permissions to it. Keep in mind that in production environments you’ll definitely want to use a role with only the minimum permissions required.
Docker registry
Next up we’re going to set up a Docker registry to which we can push the Go “Hello, World!” application that we’ll dockerize. Feel free to use any registry that you’re familiar with. If you don’t have one yet, you can easily create one for free at the Docker Hub. You can also create a private repository if you don’t like sharing your Dockerfile with the whole world.
To get a sneak peek of what we’ll build, you can find my reposity in the Docker hub: sanderknape/go-hello-world.
Once you have an account, create a repository called go-hello-world.
GitLab
GitLab is free to use. If you don’t have an account yet, you can get one at the register page. After you have created an account, create a new repository and call it go-hello-world-k8s. It’s up to you if you set it up publicly or privately. My project is public so feel free to take a look.
To be able to push code from your laptop to the repository, you need to set up an SSH key. Check out the GitLab documentation to learn how to do this.
Specifying configuration
As we’re going to connect to both the Docker Hub and to Kubernetes, we need to specify some authentication configuration. When you’re in your repository, use the left menu to open up the Settings -> CI / CD -> Environment variables. We’re going to add the following configuration:
DOCKER_USER. This is the Docker user you use to login to the Docker Hub.DOCKER_PASSWORD. This is the Docker passwrod you use to login to the Docker Hub.CERTIFICATE_AUTHORITY_DATA. This is the CA configuration for the Kubernetes cluster. For EKS, login to the AWS EKS console and open up your cluster configuration. You can find theCertificate Authorityon the right.SERVER. This is the endpoint to the Kubernetes API for our cluster. You can find this on the page where you already are.USER_TOKEN. This is the token for the user that we’ll use to connect to the Kubernetes cluster. We need to find the token for the user that we created earlier. First, list all secrets withkubectl get secrets. There will be a secret starting withgitlab-service-account-token-, which is the token for the GitLab user we created earlier. Copy the NAME for this secret, and run the following command to see the token:kubectl describe secret [NAME]. Copy the token that is part of the output, and enter it in GitLab.
Be sure to enable the Protected flag for at least the CERTIFICATE_AUTHORITY_DATA, the DOCKER_PASSWORD and the USER_TOKEN. Click Save Variables.
Building our Docker image
It’s finally time to get to the good stuff. All code that we’re going to write can be found in my GitLab repository. We’ll set up this repository step by step.
First, create a new directory and run git init. Follow the instructions in your GitLab repository to “sync” your local repository with it. Let’s create a dockerized Go app first that we’ll push to that repo.
The Go application is a super simple webserver that just returns “Hello, World!”. Create a file called main.go and add the following content:
package main

import (
    "fmt"
    "net/http"
)

func main() {
    http.HandleFunc("/", func(w http.ResponseWriter, r *http.Request) {
        fmt.Fprintf(w, "Hello, World!")
    })

    http.HandleFunc("/healthz", func(w http.ResponseWriter, r *http.Request) {
        fmt.Fprintf(w, "Healthy!")
    })

    http.ListenAndServe(":8080", nil)
}
If you have Go installed you can run the webserver as follows (if you don’t have it installed, you can also wait with running it until we have dockerized the app in a minute):
go run main.go
You can open up your browser, navigate to localhost:8080 and you should see the fine words “Hello, World!”.
Next up, let’s create the Dockerfile. In the same directory create a new file called Dockerfile and add the following content:
FROM golang:1.11-alpine as builder
WORKDIR /usr/build
ADD main.go .
RUN go build -o app .

FROM alpine:latest

WORKDIR /usr/src

COPY --from=builder /usr/build/app .
EXPOSE 8080

CMD ["/usr/src/app"]
If you are not familiar with multi-stage builds this may look a little confusing. We first build the application in the official Golang Docker image. As this image contains all the tools required to build Go images (and more), this image is a little over 100MB. However, to actually run the application, all we really need is just a bare-bones OS.
Therefore, starting at line 6, we build the final Docker image based on the alpine OS. This is only about 6MB in size. We grab the application artifact created earlier from that build, and put it in /usr/build. We then tell Docker to start the container by running our app in the last line.
Build this Docker image as follows:
docker build -t go-hello-world .
Next, be sure that the Go application we tested earlier isn’t still running. It would fail the next command as port 8080 is then already in use. We can now run our application through Docker as follows:
docker run -p 8080:8080 go-hello-world
Open up your browser again and visit localhost:8080. You should again see the famous words.
Building Docker in GitLab
The next step is to build this Docker image in GitLab and push it to our Docker registry. Create a new file .gitlab-ci.yml and add the following content:
image: docker:latest
services:
  - docker:dind

stages:
  - build

variables:
  CONTAINER_IMAGE: sanderknape/go-hello-world:${CI_COMMIT_SHORT_SHA}

build:
  stage: build
  script:
    - docker login -u ${DOCKER_USER} -p ${DOCKER_PASSWORD}
    - docker build -t ${CONTAINER_IMAGE} .
    - docker tag ${CONTAINER_IMAGE} ${CONTAINER_IMAGE}
    - docker tag ${CONTAINER_IMAGE} sanderknape/go-hello-world:latest
    - docker push ${CONTAINER_IMAGE}
As we’re going to build a Docker image inside of another Docker image, we enable the Docker in Docker service. Next we’ll use the predefined variable CI_COMMIT_SHORT_SHA to tag the image. We do this as we want to know exactly which code from our Git repository this Dockerfile contains. In addition, if we would simply use latest, rollbacks wouldn’t work in Kubernetes as rolling back from latest to latest doesn’t make a lot of sense.
In the build steps we use the previously set environment variables to connect with the Docker hub. We then build and push the Docker image to our repository.
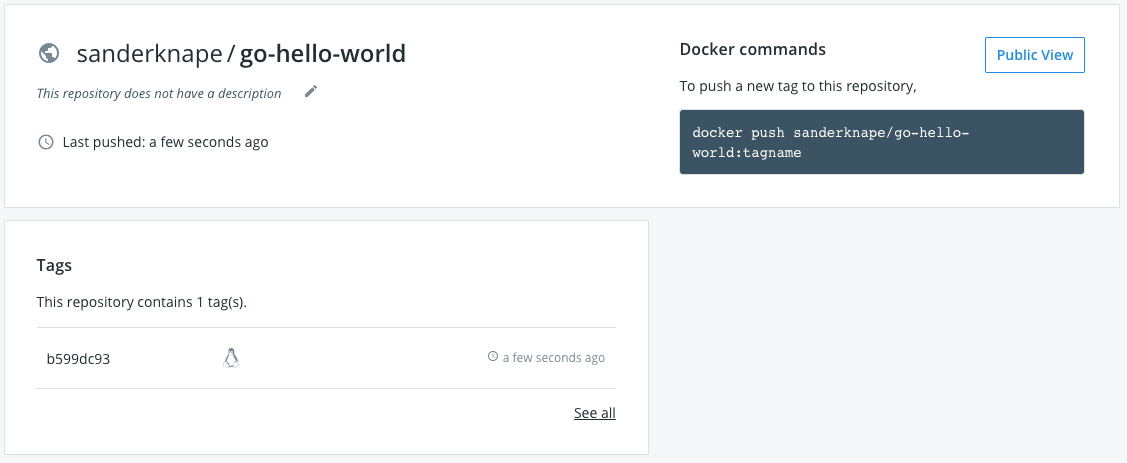
Push the three files that we created to your GitLab repository. This will automatically trigger the build job. Through the left navigation, go to CI / CD -> Jobs and open up your job. You should see a succesful push to Docker Hub. Navigate to Docker hub and you should find the first Docker image!
Kubernetes deployments
With our Docker image now available to be consumed, it’s time to push it to our Kubernetes cluster.
We’re going to create a Kubernetes Deployment. This is a Kubernetes resource that wraps Docker containers and controls their lifecycle. It makes sure to restart the containers if they are stopped and ensures that the right amount of containers is running. It can also perform rolling updates and use health checks to see if the containers are still working.
Create a new file called deployment.yaml and add the following content:
apiVersion: apps/v1
kind: Deployment
metadata:
  name: hello-world-go
  labels:
    app: go
spec:
  replicas: 3
  selector:
    matchLabels:
      app: go
  strategy:
    type: RollingUpdate
    rollingUpdate:
      maxSurge: 1
      maxUnavailable: 33%
  template:
    metadata:
      labels:
        app: go
    spec:
      containers:
        - name: go
          image: sanderknape/go-hello-world:<VERSION>
          ports:
            - containerPort: 8080
          livenessProbe:
            httpGet:
              path: /healthz
              port: 8080
            initialDelaySeconds: 2
            periodSeconds: 2
          readinessProbe:
            httpGet:
              path: /healthz
              port: 8080
            initialDelaySeconds: 2
            periodSeconds: 2
The configuration also contains rolling updates configuration and health checks (the liveness and readiness probes). Though we won’t really touch these in this blog post, you can change these settings to get a better feeling for how deployments work.
Find the <VERSION> and replace it with the tag that you pushed earlier to the Docker Hub. This is only temporary: we’ll replace this later once we create the GitLab pipeline.
Assuming you’ve correctly configured your kubectl earlier, you are now able to deploy this image to your Kubernetes cluster with the following command:
kubectl apply -f deployment.yaml
Run a kubectl get pods and you should see output similar to the following:
NAME                              READY   STATUS    RESTARTS   AGE
hello-world-go-864cbc655d-5tz9v   1/1     Running   0          40s
hello-world-go-864cbc655d-88t6f   1/1     Running   0          35s
hello-world-go-864cbc655d-psfbt   1/1     Running   0          31s
It may be that the status is still in ContainerCreating, if the image is still being downloaded (luckily only just 5MB!).
To ensure our pods our working, let’s set up a proxy to one of the containers. First, ensure that your previous tests with Go and the Docker image are not still running. Opening up localhost:8080 should give a connection-refused error. Copy/paste one of the names of the pods and run the following command:
kubectl port-forward [name] 8080:8080
Open up your browser again and you should once again see “Hello, World!”. This time coming from your Kubernetes cluster.
Deployment through GitLab
Next up we’re going to run this deployment through GitLab. First remove the deployment we just created with the following command:
kubectl delete -f deployment.yaml
Ensure that no pods are running with kubectl get pods. Now, replace the SHA you added earlier with the string <VERSION> again. This will be replaced with the latest SHA in our GitLab pipeline.
Add the following new stage at the end of your .gitlab-ci.yml file:
deploy:
  stage: deploy
  image: dtzar/helm-kubectl
  script:
    - kubectl config set-cluster k8s --server="${SERVER}"
    - kubectl config set clusters.k8s.certificate-authority-data ${CERTIFICATE_AUTHORITY_DATA}
    - kubectl config set-credentials gitlab --token="${USER_TOKEN}"
    - kubectl config set-context default --cluster=k8s --user=gitlab
    - kubectl config use-context default
    - sed -i "s/<VERSION>/${CI_COMMIT_SHORT_SHA}/g" deployment.yaml
    - kubectl apply -f deployment.yaml
We use an existing Docker image that already has kubectl installed. We then configure the cluster, user and context with the environment variables we set earlier so that we can connect to the cluster. When setting the cluster we can unfortunately not directly set the certificate-authority-data as no flag exists for it. There is a GitHub issue open for this. We therefore set the CA data using an additional command.
We also perform a sed to replace the
Finally, higher up in the file find the stages array. Add deploy after build.
Push these changes to your GitLab repository. The new deploy step will have applied the deployment to Kubernetes. Run kubectl get pods to see your pods running again. In addition, if you run a kubectl describe pod [name], you can see the image that is pulled from Docker Hub. You can verify that this is indeed the latest tag that was pushed to the hub.
Like before, run kubectl port-forward [name] 8080:8080 on one of the pods to verify that it can succesfully accept connections. And that was it - you now have a fully automated pipeline that deploys from your laptop to a Kubernetes cluster!
Teardown
Remove the Kubernetes cluster with the following command:
eksctl delete cluster --name=go-hello-world
Keeping the Docker Hub and GitLab up and running won’t cost you anything, though you can of course delete the resources we created.
Conclusion
In this blog post we created a fully automated deployment pipeline to Kubernetes using GitLab. While the pipeline doesn’t contain any automated (unit) testing or promotions of the application through different environments, it should give enough of an idea on how to build a pipeline with such features for Kubernetes. Happy deploying!