Getting started with AWS Cognito
Did you ever write your own authentication service? In essence it’s quite trivial: allow a user to enter a username and a password. Next, look in a database for a row/document that matches the received data. If found, login. If not, be gone. It becomes harder when you start thinking more about proper security. And what about features such as password resets, login throttling or logins with Google/Facebook? Surely a managed service must exist that can make all this much easier for us.
AWS Cognito is an example of such a service. It provides the features mentioned before and then some more. Does using such a service really make life easier? That’s the question I tried to answer when I started looking into AWS Cognito. Unfortunately, it seems that AWS Cognito is certainly one of the lesser documented services. It’s also certainly not a service that people write a lot about.
The goal of this blog post is therefore to explain how to implement the most basic user flows such as signups and login so you can more easily get started. I’ll mainly discuss some theory and provide the API calls associated with the discussed flows. In addition I wrote a very simple PHP application that implements the discussed user flows. For a concrete example of how to build an application that uses AWS Cognito for authentication, check out my sample application on Github.
Even though the examples will be in PHP, it should be very easy to translate the examples for use with SDKs in different languages. The following user flows will be discussed:
- User registration
- User Login
- Securing a page for only logged in users
- Resetting a forgotten password
- Logout
AWS Cognito: the basics #
Let’s quickly go through some terminology first. AWS Cognito stores users in user pools. This pool can be filled with users by manually adding them as an admin, syncing it with a backing user management system, or by simply allowing users to sign up. Each user pool receives a UserPoolId. In some API calls, this ID is required. Programmatically communicating with this pool is done as a client. You add these clients in the AWS Cognito. Each of these clients will receive a ClientId that is also send in almost all API calls.
With that out of the way, all code examples should make sense (look out for both the UserPoolId and the ClientId). Let’s start with the first user flow: registration.
User registration #
Let’s take a look at how to allow users to sign up. The flow that we need to implement is a relatively simple, three-step process:
- Allow the user to signup by providing a username, email and password and any other attributes if desired.
- If no errors are thrown during the signup (such as an already taken username or a password that does not adhere to the requirements), an e-mail is sent containing a confirmation code. If a phone number is known and SMS is properly configured with AWS’ Simple Notification Service (SNS), sending a text message is an option as well.
- Registration is confirmed by providing the username and confirmation code found in the e-mail together.
The signup API call looks as follows:
$client->signUp([
  'ClientId' => CLIENT_ID,
  'Username' => $username,
  'Password' => $password,
  'UserAttributes' => [
    [
      'Name' => 'name',
      'Value' => $username
    ],
    [
      'Name' => 'email',
      'Value' => $email
    ]
  ],
]);
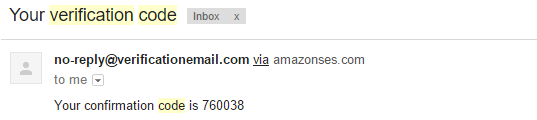
By default, a simple e-mail (the template can be changed) is sent that looks as follows:
Next, given the confirmation code, a user can be confirmed with the following API call:
$client->confirmSignUp([
  'ClientId' => CLIENT_ID,
  'Username' => $username,
  'ConfirmationCode' => $code,
]);
Of course, usability can be greatly improved by providing a link in the e-mail that already contains the username and confirmation code. This way, all the user has to do is click the link and confirmation is handled behind the scenes.
In situations where users do not signup themselves but receive an account through an administrator, the AdminCreateUser API call is more appropriate. It creates a user with a temporary password that has to be changed on first login and sends a welcome message to either an e-mailadres or SMS message.
Finally, a small tip. Check out the possible exceptions that can be thrown for each API call that you use. For example, a UsernameExistsException can be thrown during user signup. Be sure such errors are displayed properly to the user.
User Login #
Users who have successfully registered and confirmed themselves are able to log in by specifying their username and password (for users who attempts to login but are not yet confirmed, a UserNotConfirmedException will be returned by the API). Two different API calls exist for user login: AdminInitiateAuth and InitiateAuth. With only the first being implemented in the PHP SDK, let’s start with that one. The API call that we execute looks as follows:
$result = $client->adminInitiateAuth([
  'AuthFlow' => 'ADMIN_NO_SRP_AUTH',
  'ClientId' => CLIENT_ID,
  'UserPoolId' => USERPOOL_ID,
  'AuthParameters' => [
    'USERNAME' => $username,
    'PASSWORD' => $password,
  ],
]);

$accessToken = $result->get('AuthenticationResult')['AccessToken'];
In the next section we will see how we can use the received access token to view a secured page. First though, let’s talk a bit about the authentication flow (ADMIN_NO_SRP_AUTH), where we specify not to use the Secure Remote Password (SRP) protocol. When using this protocol, the user is authenticated without sending the password to AWS Cognito (check out the previous Wikipedia page to learn more about the protocol). In essence, it allows a user to login without sending the actual password over the internet. The protocol however is not built into the PHP SDK, so setting this up is quite complex. The added security is largely neglectable if using HTTPS as potential perpetrators will not be able to sniff the password anyway.
Using the InitiateAuth API call with SRP is mainly required for a different reason: it allows you to login without any AWS developer access credentials. This can certainly be a benefit when, for example, logging in from a mobile device where you don’t want to store any AWS credentials. With the SRP protocol built-in to the Android, IOS and Javascript AWS SDKs, implementing login should be relatively easy. AWS recommends you to use SRP but provides the non-SRP login for logins routed through backend servers (e.g. a website where the login request is routed to the website’s server and from there to AWS Cognito).
Securing a page for only logged in users #
The simplest way to store the access token for the user is by inserting it into a cookie. On every page load, the access token can then be fetched from the cookie. This token needs to be included in any API call that requires the user to be logged in.
Whenever you issue an API call that requires an access token, you will get a NotAuthorizedException in case the token is invalid. This can be either because its expired or tampered with. Refreshing an access token is outside of the scope of this blog, but check out the refresh token documentation to get this working.
How then can we allow access to a page only if a user is logged in? Simple: we issue an API call that requires the user’s access token. If we get the NotAuthorizedException it means the user is not logged in. An example of such an API call is the following:
try {
  $user = $client->getUser([
    'AccessToken' => 'fake'
  ]);
} catch(\Aws\CognitoIdentityProvider\Exception\CognitoIdentityProviderException $e) {
  var_dump($e->getMessage());
}
This will return an authentication error with the following contents:
{"__type":"NotAuthorizedException","message":"Invalid Access Token"}
In general, be sure to catch this exception on a global level. If a user gets logged out because of an expired access token its best to perform a redirect with a “your session expired” to the login page.
Resetting a forgotten password #
Another fun piece of functionality is to reset a forgotten password. The general flow for this is as follows;
- The user requests to reset a forgotten password. This is done by sending a verification code to a known contact method: e-mail or SMS.
- The user specifies a new password and includes the received verification code in the request. This way we know that this is the same person who requested the reset.
Two API calls are required for this. First to request a reset:
$client->forgotPassword([
  'ClientId' => CLIENT_ID,
  'Username' => $username
]);
After the user specifies the confirmation code and password, we issue the following API call:
$client->confirmForgotPassword([
  'ClientId' => CLIENT_ID,
  'ConfirmationCode' => $code,
  'Password' => $password,
  'Username' => $username
]);
As with the confirmation step after registration, the confirmation code can be kept “hidden” from the user if we specify a URL in the e-mail that includes the token. All the user has to do is specify the new password.
Logout #
Logging out is by far the easiest of all user flows: simply forget the access token on the client side. If we empty the cookie
One API call exists related to logging off: GlobalSignOut. Through this you can ensure that a user really can not authenticate again using the same access token. There is one caveat though: the user will be logged out on every connected device. This will therefore only pose a problem if you use AWS Cognito Sync and you don’t want to sign out your user on every device. In general, simply getting rid of the access token on the client side should be enough.
Conclusion #
In this blog post I went through the most basic user flows that can be implemented against AWS Cognito. Together with my sample application, I believe the theory and examples should give you a boost in getting started with AWS Cognito. So, is AWS Cognito worth checking out? If you are looking for an easier way to handle your authentication, definitely. Most of the implementation details are already built into AWS. In addition, you have the added benefit of allowing federated login and syncing between different devices. If time allows it, I hope to follow up this blog post discussing those topics. Happy authenticatin'!